
The Ultimate Chanhassen Kitchen Remodel Checklist: Plan Your Dream Space
Remodeling your kitchen is a chance to create a space that’s truly the heart of your home—a place for family meals, gatherings with friends, and quiet mornings with a cup of coffee. But with so many decisions to make, it can feel overwhelming. This ultimate checklist is designed to guide you through every step of your kitchen remodel, ensuring a smooth and rewarding journey. These steps will help you plan a kitchen that’s both beautiful and functional, tailored to your family’s needs.
Step 1: Define Your Goals and Layout Needs
Start by thinking about how your family uses the kitchen. Are you an avid home cook who needs a spacious workspace with a double oven? Do you love hosting dinner parties and need an open layout with a large island for guests to gather around? Or perhaps you have young kids and want a layout that keeps them in sight while you cook, with plenty of storage for snacks and supplies. Consider your current kitchen’s pain points—maybe there’s not enough counter space, or the layout feels cramped. Make a list of must-haves (e.g., a walk-in pantry, a farmhouse sink) and nice-to-haves (e.g., a built-in coffee station). Sketch out a rough layout or gather inspiration from magazines, Pinterest, or local home tours to visualize your dream space.
Step 2: Establish a Realistic Budget and Timeline
Kitchen remodels can vary widely in cost, often ranging from $20,000 to $50,000 or more, depending on the scope and finishes. Begin by setting a budget that accounts for major expenses like cabinetry, countertops, appliances, and labor, as well as smaller costs like permits, temporary kitchen setups, and decor. Add a 10-15% contingency for unexpected expenses, such as plumbing or electrical updates. Next, consider your timeline. A full kitchen remodel typically takes 6-8 weeks, but custom features or delays in material delivery can extend this. Decide if you can live without a kitchen during this time or if you’ll need a temporary setup, like a microwave station in the dining room. Research average costs and timelines to set realistic expectations.
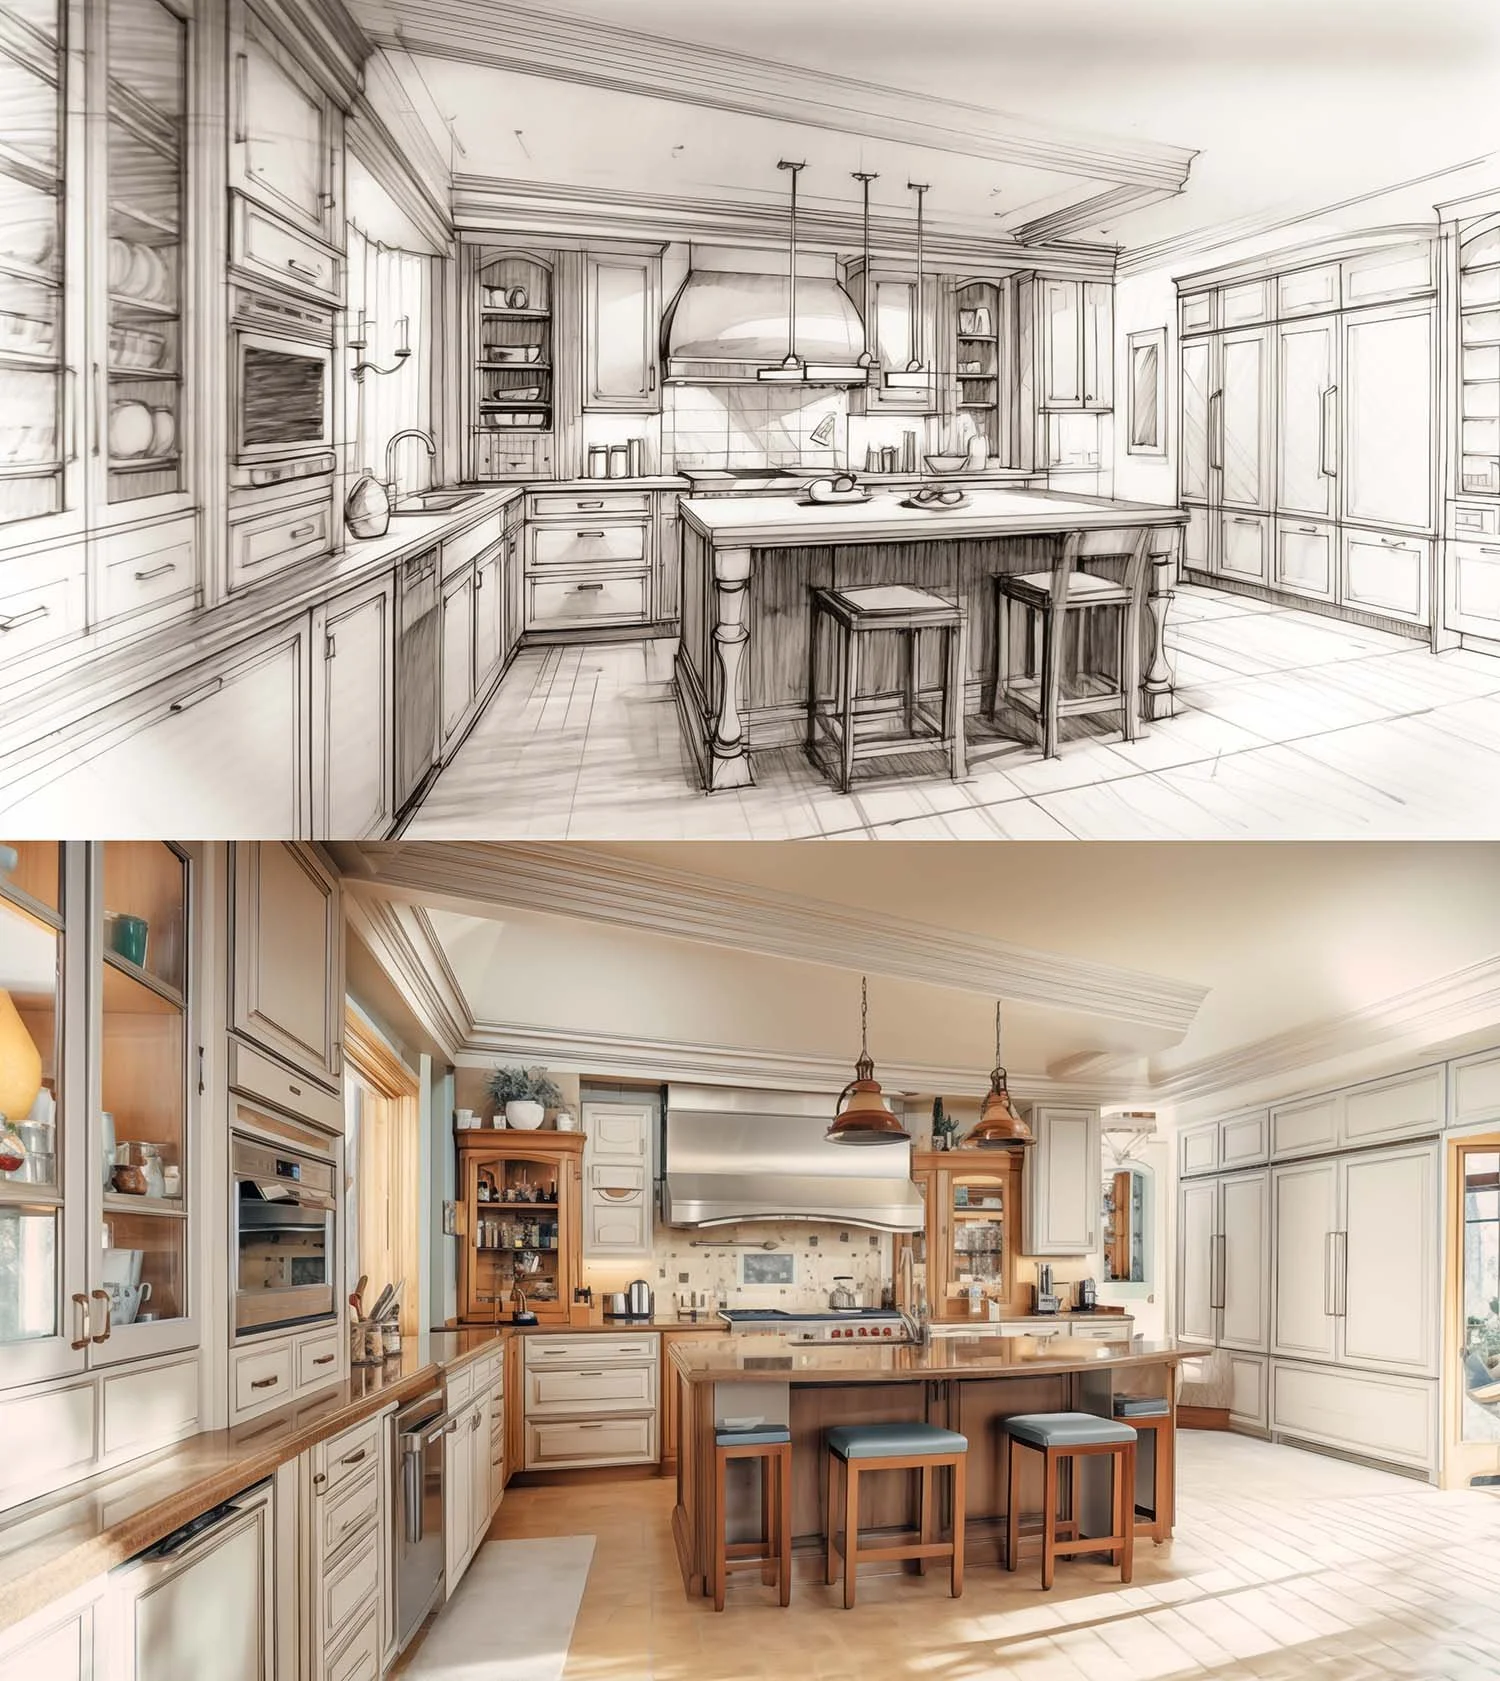
Step 3: Select Durable Materials and Finishes
Your kitchen should be as durable as it is beautiful, especially in a busy household. Choose materials that can withstand daily use while matching your style. For countertops, consider quartz or granite for their durability and low maintenance—both resist stains and scratches well. Hardwood floors in a warm oak or walnut finish add timeless appeal, but if you prefer low maintenance, porcelain tiles that mimic wood are a great alternative. For cabinetry, opt for solid wood or high-quality plywood over particleboard for longevity; white or soft gray cabinets with sleek handles keep the look classic. Select a backsplash that complements your design—subway tiles in neutral tones are a safe bet, or try a herringbone pattern for a touch of elegance. Don’t forget appliances: stainless steel or matte black finishes are both stylish and practical for family use.
Step 4: Plan for Functionality and Storage
A well-designed kitchen balances beauty with practicality. Think about how you move through the space and prioritize the “kitchen work triangle” (sink, stove, refrigerator) for efficient cooking. Ensure there’s enough counter space on either side of the stove and sink for prep work—aim for at least 36 inches if possible. Maximize storage with solutions like deep drawers for pots and pans, pull-out shelves for spices, and a pantry for dry goods. If you have a large family, consider a double sink or a dishwasher with extra capacity. For smaller kitchens, vertical storage like tall cabinets or open shelving can make the space feel larger while keeping essentials within reach. Don’t forget lighting: combine overhead fixtures with under-cabinet lights to brighten work areas and create a warm ambiance for evening meals.
Step 5: Prepare for Construction and Final Touches
Before construction begins, finalize your plans with your contractor, ensuring all permits are secured and materials are ordered to avoid delays. Set up a temporary kitchen space—stock a cooler with essentials, use a microwave or electric skillet, and plan simple meals to minimize stress during the 6-8 week remodel period. During construction, expect some dust and noise, but a good contractor will keep the workspace tidy and safe. As the project nears completion, inspect the work closely: check that cabinet doors open smoothly, appliances are installed correctly, and finishes match your vision. Add personal touches like a vase of fresh flowers, a colorful rug, or family photos to make the space feel like home. Once finished, do a final walkthrough to ensure everything meets your expectations before signing off.
Planning a kitchen remodel doesn’t have to be daunting. This checklist helps you stay organized, avoid common pitfalls, and create a space your family will love for years. At Hansen Hometech, we’re here to bring this checklist to life with over 60 years of family-owned craftsmanship. From personalized planning and transparent timelines to durable materials and seamless construction, we address every step with care, ensuring your remodel is a success. Ready to start your journey? Let’s create a kitchen that’s the heart of your home.